Monthly Archives: April 2014

The Anatomy of a Piece: Rooflines#15 WIP

About two weeks ago, I was really feeling quite smug as I thought I had my Art Prize entry for 2014 all pieced out and ready to trim and photograph. I was going to use a workshop piece that I had created last fall.  But I pulled it out and really didn’t like it for this exhibition.

So , I gave myself 48 hours to decide: yes or no to Artprize 2014. The answer was yes but with a new piece. And I only wanted to devote one week to see if i could create something Artprize worhy. Here is the chronicle of events over the past few days in pictures. I am not going to spend  lot of time editing them for you but just lay them out as I took them.

I wanted a plan to limit my overall craziness as I obsess over new designs. So I wanted to make another piece similar to Rooflines #8, a red/blue piece. Super simple , I thought.


DSC_6981


Start with lots of strips so I have options.  I really hate strip piecing -why did I choose this?  Too late to change and I decided to just plod ahead. Ok, just focus and take pictures. Think about values.

DSC_6983


Black and white looks good. Keep going.  I have no more of the lighter colors but I ignored this blatant fact.


DSC_6987


No problem as the board is filling up. Ignore design and fill up the board. Seems like a great plan.
DSC_6996


Filling up but kind of dark. Add lavender strips. Rip it apart to do it.


DSC_7004


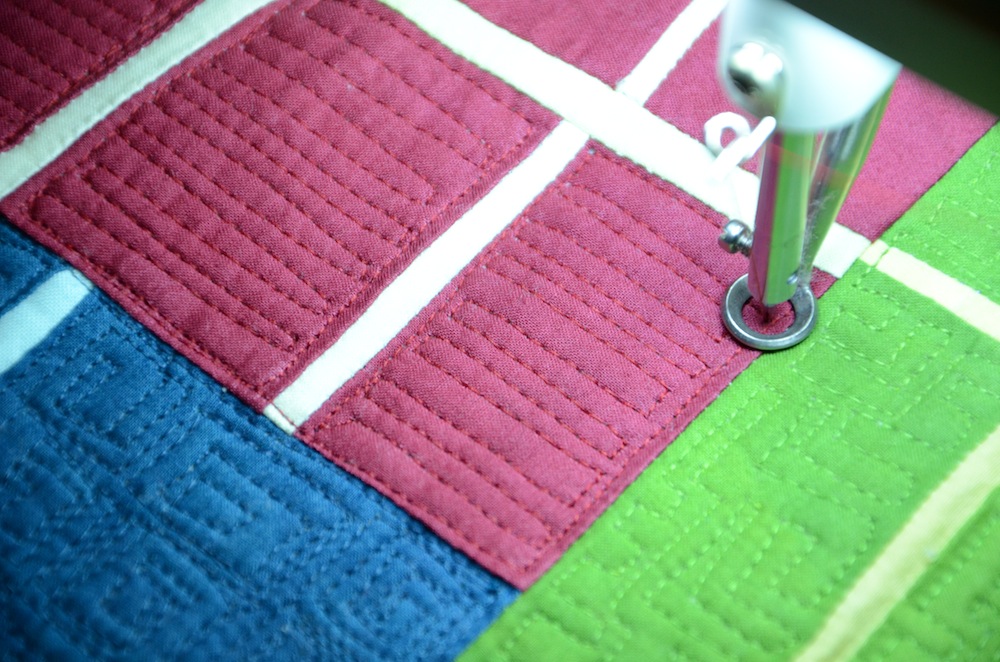
Needs rooflines inserted. Good job with one set in and looks good.

DSC_6988


Other sets of roof lines needed and placement looks good. Keep going. Wake up in the morning and realize that it looks like a set of draperies. Ugly draperies. It was a few hours of panic. One of those Ralphie moments form The Christmas Story when the dogs steal the turkey. What are you going to do now, Miss Smarty? Better cut it up. Ok, cut away.

My favorite tools for the nasty job of changing design mid -stream :


DSC_7018


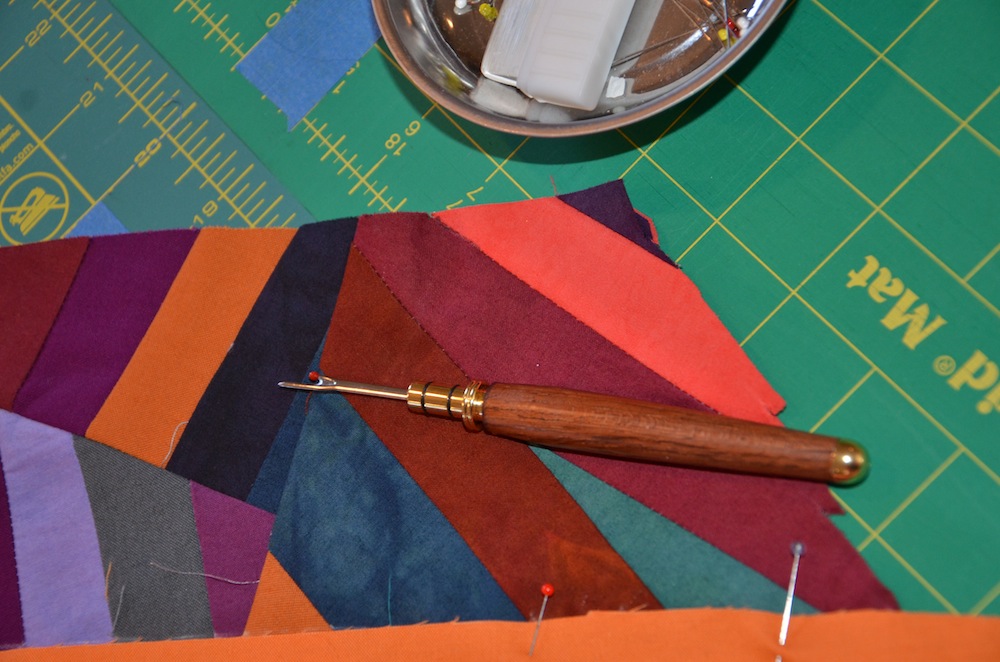
A spiffy seam ripper


DSC_7017


and my tailors’ chalk as I can’t live without it now. Chop it up and insert pieces.


DSC_7010

Better, I suppose. But I had no idea how to inset parts and pieces on the other side. It was way past my construction level and i was in a piecing pickle. I could have done it so much easier IF I had a well thought out design.

Learn how to inset seams and do all sorts of strange rip outs in order to make it work.


DSC_7019


Slowly making progress.


DSC_7013


Almost there.


DSC_7016


Done as it will be for now. It measures about 68×65 so not a small piece.


DSC_7024

Rooflines #15 WIP ©Colleen Kole, 2014, approx 68×65


DSC_7027

My critique in my journal. I give it about a 5 on a 10 point scale with room for improvement need but a god seed project. Yup, I have spent 105 hours on it from april 16-April 26th as I am trying to calculate how long some of my processes take for our Master Class.


DSC_7028

That’s all the fabric I had left at the end of the piecing frenzy. And there is the anatomy of my process and Rooflines #15.

I will give it 48 hours to deem whether or not it is Art prize worthy. I never like a piece when it’s first finished. I do love the accomplishment , though, of conquering this piecing job!

Part 2: APQS George review

I have been using the APQS George to free motion quilt my latest piece. Most sane quilters use the realistic idea that you should practice first on baby quilts or muslin sandwiches before you tackle a large piece. Well. as impatient as I am , I did give it a try for about maybe 10 hours. Boring. Very boring. And it is not very realistic as my work has lots of seams with little lines.

So, I basted a piece up and away I went. I was very careful to test on a sample before I jumped into a change of color or change in type of thread but I definitely just said to myself: get going and quit being a perfectionist.

DSC_6956


In the process of spending about 25 slow hours of machine quilting on it, I bonded with this machine.  I learned the following tips and tricks which may make your journey a little easier:

1. Do test each and every bobbin and thread change for accurate tension on a muslin sample. He is FUSSY and likes to be pampered a bit as far as tension is concerned. He works beautifully if you have the top and bottom tension happy with each other. Otherwise , you are not in control and he is. The extra time to fiddle with the tension is worth the time you would spend ripping out bad stitching.

2. I tried various combinations of threads. I found that the combo of Superior Threads So Fine  on top and Bottom Line in the bobbin works well.  Also, I tried Masterpiece in the bobbin with Mettler Cotton on top and it was not a planned experiment but it worked well.  I did eventually get Aurofil to work as well but I needed lots of patience with this thread.

3. George wants to run fast and does better if I set my speed and let him work full speed at that speed .(Confusing sentence if you don’t have this machine …) But push your pedal down and fly on the speed. This is a big machine and when I finally got moving and got my rhythm, he was happy to oblige with nice stitching.

4. The bobbin winder that they send with the machine is really CHINYZY. The Simplicity bobbin winder gave me big headaches . I am not sure why this cheap piece of equipment is sent with this expensive machine. I started winding my bobbins on my domestic machine and since then the bobbin tension has been much easier to control. I am using a Bernina 430 to wind the bobbins which is one of my piecing machines. This is the only complaint I have at this time with my machine.

So ta-da: my first finish on my George!


Rooflines #14  which needs facing yet

Rooflines #14 which needs facing yet

Rooflines #14 is not a huge piece-39×58 at this point without the facing -but it was breeze to work with it on this machine. When I conquer a beast of q quilt, I will update you again!


Part One: My First Impressions of George

IMG_1317

Snaazy packaging

     Not too long ago, a new machine named George came to live with me. This was a long researched sewing machine and I really wanted this one to be “it” and have it live with me for long happy life. Now, I have been known to be a bit fickle about sewing machine but I have been loyal to my recent machines.

     Why consider a long arm machine? Quite simply, I hated slugging a large quilt under the small harp of a domestic machine. And I knew that long term sewing would wreak havoc with my shoulders. They really hurt after the big quilts and , as a previous physical therapist, knew that the repetitive stress would lead to nasty shoulder syndrome. (“Arthuritis” would settle in. )

I visited my friend the lovely Terri Watson who let  me try her Gamill machine one day. I loved it. The ease with which I could finish a quilt was astounding and rewarding. But I couldn’t justify the high cost of a typical long arm if I wasn’t going into business to finish others quilts. And I wasn’t.  So, over the course of two years, I went to different shows and tried lots of sit down models.  And slyly enough, a George was at the Barn the last two times I went to workshops and the wonderful Beth Shillig, an APQS dealer,  was there to entice us to play with George.

I fell in love with him. I was smitten with him.

IMG_1318

George set up and ready to go

The reasons why:

1. He was solid. He felt and looked like hefty machine that could handle the beasts of things to come. I like piecing large quilts. I don’t like quilting them.

2. He did not intimidate me as I could use my same skills that I had doing free motion quilting on my domestic machine.

3. And he could accommodate smaller needle.

4. He has a really decent sewing table that is included in the price.

5. He has a good reputation among other art quilters. I hadn’t heard negative things.

So, I took the plunge and made George a part of my studio not so long ago. I have been spending time with him and learning to adjust to him the past few weeks.

DSC_6936

Changing a needle for the first time

I am in the learning curve portion of my adventure with George. More next post about the pros and cons I have found early on in this adventure.